My TDD Workshop

I was recently asked to conduct a workshop (read everyone-off-their-armchairs-and-type-with-me) on Test Driven Development. Now since this is something that I love (could not be any more apt for my 100th blog-post), I kind of "invested all of my self esteem in this presentation" as Dilbert would have said.

I don't have the code examples complete - I didn't like the way the GUI example turned out ; gonna give it another whirl soon.


Creative Commons License
Test driven development Workshop 2009 by Gishu Pillai is licensed under a Creative Commons Attribution-Noncommercial-Share Alike 3.0 United States License.
Based on a work at docs.google.com.
Permissions beyond the scope of this license may be available at
my-tdd-workshop.html


My guiding principles were
  • to give the attendees a true taste of TDD (vs automated-tests after vs test-first programming)
  • to set up beacons to avoid the usual pits, which sink time, effort, people, projects
  • to condense what I felt were in the "must-know" category
  1. Test "driven" design - emergent design
  2. SOLID Principles
  3. Mocks and Dependency Injection
  4. Model View Presenter / Humble dialog way of building GUIs
  • to learn myself from the interaction (I've learned from a lot of people online. It 's only fair that I give back)
So I got onto google docs, fired up a presentation, wrote up a rough list of things that I considered important and off I went towards an initial draft. I asked around for a good non-toy problem for the code-alongs... to my surprise I didn't net that many.. so I settled for the Bowling Example of TDD yore (Ron Jeffries, Uncle Bob, et. all)
"Score a complete bowling game as per the standard scoring rules."

I also needed an extension to the problem that involved a bit of Mocks and GUIs (for some real world flavor) - so I extended the problem (of course with my "customer hat" on)
"Create a View/Display for the Bowling Game that shows pins rolled and score updates in real time."

I then tried to solve the problem myself. The second problem turned out to be more time-consuming than I imagined. (A definite possibility is that I had lost my touch with TDD and was rusty due to lack of practice - a shoutout to Naresh Jain, for helping me realize that)
Finally I published the draft online to the testdrivendevelopment yahoo group for scrutiny ; As always I got a lot of help and nice suggestions. (A big thank you! to all of you) I incorporated most of them - including expanding my 1-day plan to a 2-day (and finally a 3-day plan - Charlie Poole can go 'told you so')

I then conducted the first instance of the workshop with 13 attendees.
The first day went as per plan. TDD Origins, SOLID Principles, Bowling Game Part I.
However the second day, the rails came off. They loved the Rhino Mocks jumpstart - however coding along ate up a lot of hours. I skimmed the Moq equivalent exercise and somehow rushed through to the end. The grand-finale of building a GUI (which was supposed to illustrate how you can design incrementally and it's okay if you dont have a 30 page design-document blessed by the powers that be, if you pay attention to design all the time) had to be left as an "exercise for the attendee". I'll need to extend the workshop to a full 3 days next time.


Had the opportunity to do a lot of little experiments - like using a Chess Timer to time how much time I spent writing tests to code. Good fun overall! It also showed me that I need to tune my content a bit more - the anonymous feedback was encouraging. Scored a 100% on "Would you recommend this (session) to someone else" ? Just the impetus I needed to sink another bunch of hours tinkering with the content.

Testing .Net code with Cucumber and IronRuby

As promised, this is the culmination of this trilogy. The previous two posts were a jump-start on Cucumber to test Ruby code. Next I moved towards using Cucumber's plain text stories to test .Net code.Aslak Hellesoy has a wiki-post on how to do this ; however I found that you get eaten and spat out by a lot of IronRuby dragons along the way. So hold on..

1. Install the new DLR

First up install .Net Framework 4.0 (I have Beta1) - this has the new Dynamic Language Runtime (DLR) that makes things like IronRuby and IronPython possible.

2. Get the latest IronRuby release

Next we need to get IronRuby as a zip. Extract it to say d:\ironruby-0.9.0 Add the path to the bin folder to your PATH environment variable to avoiding lengthy paths. Drop to a command shell, type 'ir' to invoke the interactive IronRuby console. Type something simple to test if it works. It should.
>>>puts "Hello IronRuby"


3. Dragons ahead. Use diversion

But I hit a snag with this version of IronRuby, which had A BUG.

  • So I had to get the latest (8 Sep 2009 master to be precise) version of the source from the github repository to overcome that. You can download it as a zip or use git as you prefer. I got the zip
    ironruby-ironruby-90cdda82fd60f4b7e6d7d940501c586d55954466.zip (Could have used a shorter name)

  • Extract it to say d:\ir-src
    I hit a few path-too-long errors during extraction. Just keep skipping them. I think it's because of the rather large alphanumeric string which is the name of the top-level folder.

  • Once extracted, navigate to D:\ir-src\ironruby-ironruby-90cdda82fd60f4b7e6d7d940501c586d55954466\Merlin\Main\Languages\Ruby
    and open Ruby.sln in VS2008 (I have Dev Edition of VSTS.. Although it should build in VS Express Editions as per the docs - I couldn't get the solution to open in it.)
    Build Solution. At the end of it you should find the built binaries in
    D:\ir-src\ironruby-ironruby-90cdda82fd60f4b7e6d7d940501c586d55954466\Merlin\Main\bin\Debug

  • Rename that directory with the huge name to something like "ir".

  • Copy all built binaries and overwrite the ones from the 0.9.0 release's bin folder i.e. D:\ironruby-0.9.0\bin.


  • Open ir.exe.config in the same folder and update the Library paths element to the proper paths to folders within your ir-src folder. 'Handle with extreme care' or you'll lose hours chasing error messages. It should read
    Path#1 - D:\ir-src\ir\Merlin\Main\Languages\ (NOT D:\ir-src\ir\Merlin\External.LCA_RESTRICTED\Languages)
    Path#2 & #3 - D:\ir-src\ir\Merlin\External.LCA_RESTRICTED

    My xml looks like
    <set language="Ruby" option="LibraryPaths" 
    value="D:\ir-src\ir\Merlin\Main\Languages\Ruby\libs\;D:\ir-src\ir\Merlin\External.LCA_RESTRICTED
    \Languages\Ruby\redist-libs\ruby\site_ruby\1.8\;D:\ir-src\ir\Merlin\External.LCA_RESTRICTED\Lang
    uages\Ruby\redist-libs\ruby\1.8\" />


4. Wrapper script ICucumber

Lastly we need a wrapper script to invoke cucumber with Ironruby. Create a file called icucumber.bat under your Ruby bin folder i.e. D:\Ruby\bin\icucumber.bat with the following text.

REM Update with appropriate values for GEM_PATH, Ruby bin and the path to ir.exe
@ECHO OFF
REM This is to tell IronRuby where to find gems.
SET GEM_PATH=d:\ruby\lib\ruby\gems\1.8
"D:\ironruby-0.9.0\bin\ir.exe" -D -X:ExceptionDetail "d:\ruby\bin\cucumber" %*


5. Back to our example from the previous two posts.
The .feature file stays unchanged.
Delete c:\cukes\dot_net_features\support\BowlingGame.rb ; since we're going to implement the same in C# this time around as
c:\cukes\dot_net_features\support\BowlingGame.cs


namespace CukesDemo
{
public class BowlingGame
{
public void roll(int pins_knocked_down)
{
Score += pins_knocked_down;
}

public int Score
{
get; set;
}
public bool Over
{
get { return false; }
}
}
}


Also create a small batch file to compile it to a DLL (Assumes csharp compiler is on the PATH).
c:\cukes\dot_net_features\support\Compile.bat

IF EXIST bin GOTO COMPILE
MKDIR bin
:COMPILE
csc /t:library /out:bin/BowlingGame.dll bowling_game.cs


Finally back to our step definitions to check the glue. Four changes needed - explained in comments.
cukes\dot_net_features\step_definitions\bowling_game_steps.rb


# CHANGE 1 : Add bin folder to load-path
$:.unshift(File.dirname(__FILE__) + '/../support/bin')
# CHANGE 2 : Get BowlingGame.dll
require 'BowlingGame'

Given /^I am starting a new game$/ do
# CHANGE 3 : Use Namespace::ClassName.new
@game = CukesDemo::BowlingGame.new
end

When /^I roll (\d+) gutter balls$/ do |count|
count.to_i.times{
@game.roll(0)
}
end

Then /^the score should be (\d+)$/ do |expected_score|
@game.score.should == expected_score.to_i
end

Then /^the game should be over$/ do
# CHANGE 4 : be_over passes even if Over returns false. Don't know what is the equiv of over?

in .Net
#~ @game.should be_over == true
@game.over.should == true
end

When /^my rolls are (.*)$/ do |rolls|
rolls.split(' ').each{|roll|
@game.roll(roll.to_i)
}
end


Now for the grand finale, run Cucumber to verify our .Net DLL via IronRuby !!!
[Cukes_06.jpg]

HTH

Scenario Outlines and Tagging in Cucumber

Post#2 in this trilogy.

Scenario Outline

Scenario tables are similar to Fit's ColumnFixture and NUnit's RowTest. You run the same scenario with different inputs each time.
Let's go back to our plain text feature and add the following.


Scenario Outline: score should be as per the std rules
Given I am starting a new game
When my rolls are <rolls>
Then the score should be <score>

Scenarios: lets go bowling
| rolls | score |
|5 2 | 7 |
|5 5 5 | 15 |


The key things to remember here are the 'Scenario Outline:' marker to indicate that it is an outline. We then have placeholders within angular brackets. The Outline is then followed by one or more tables identified by the marker 'Scenarios:'
The next line should contain column headers which correspond with the placeholders in the outline. Cucumber would substitute the values to run each row against the Outline.

SARC and it should fail. Let's go fix that up in bowling_game.rb


class BowlingGame
attr_reader :score
def initialize
@score = 0
end
def roll( pins_knocked_down)
@score += pins_knocked_down
end
def score
@score
end
def over?
true
end
end


SARC. Now you should see this nice listing.
[cukes_05.jpg]

Tagging

You can tag a scenario (or a feature) with one (or more) tags.
@important, @fast
Feature: Bowling Game Score Calculation
In order to let the player know his score


By default, cucumber runs all .feature files in the features subfolder. You can group features in different subfolders as well e.g. I can define a new.feature within a new_features subfolder, which can then be run with
>cucumber new_features

Overtime, it can get crowded with lots of subfolders. But tagging is here to save the day..
To run only features/scenarios marked 'fast'
>cucumber --tags @fast

To run features/scenarios that are not marked 'fast'
>cucumber --tags ~@fast


So that's another way to quickly sort out your tests.

Language Support

The next thing you'd probably want to know (just in case you need it) is that cucumber speaks multiple languages. You can write your .feature file in any language - provided that the necessary entries are made in the resource file - languages.yml.

Next post - getting cucumber to test a .Net app with some help from IronRuby. Piqued?


Resources on BDD / Cucumber (although I felt the majority were too entwined with Rails (e.g. WebRat for testing Web Apps via free step definitions) but then that very well could be the major user-base for cucumber right now.)

Green in 30 mins : Getting Started with Cucumber (a test framework for BDD)

Prologue:
BDD is TDD with an outside-in (top-down) bent.
The way to tackle any new feature request is to ask Why 5 times? An you should arrive at one of Protect Revenue, Increase Revenue or Manage Cost. If not, chances are you’re building something that is not needed.
A feature can be summarized in a few lines as (ala Mike Cohn’s user story format)


As a <role>
I want <feature>
So that <value>


Dan North began this journey with JBehave.
It evolved over time into a Ruby gem - RSpec courtesy David Chelimsky n co. RSpec consisted of two parts - example runner and a story runner. The story runner runs features (think big cog) written up as plain text files which can be ‘executed’ (via some developer-added connecting-glue code in a separate location). The example runner (think small cog) is a bunch of module specs that make the feature happen. (think xUnit for BDD).
The RSpec story runner has now been simplified/improved and become Cucumber – a really neat little tool by Aslak Hellesoy. There are others too who have contributed to this movement like Dave Astels, et. all


You can still use RSpec example runner in tango with Cucumber or you could stick with xUnit under the hood instead of RSpec.
Enough prologue for today.

Now I've spent 3-4 days chasing hyperlinks and watching screencasts (links at the end of Post#2 in this series), this post should give you a rolling start on cucumber.


Step1# Installation

You need a few Ruby Gems to get rolling. (RSpec & Win32Console not mandatory)

gem install rspec
gem install cucumber
gem install win32console


I have rspec (1.2.8) | cucumber (0.3.99) | win32console (1.2.0). Try ‘cucumber –help’ to verify this step. Win32console is for color output on Windows.

Step2# Lets go bowling

I’ll take the popular ‘Score a bowling game’ TDD Kata as an example.
So we begin with a feature. (I’ll skip the pop-the-why-stack ; this feature falls into the ‘protect revenue’ category). Find a nice empty directory let’s say c:\cukes. Create a features subdirectory within it.
We create a new file : features\bowling_score.feature and type this in. This is called the feature narrative – it’s just a descriptive block of text. However the form is slightly different the context/value clause rises to the top with the prefix In order to <business value>. Spotlight on business value!
Note: Indentation matters! Spaces preferred.

Feature: Bowling Game Score Calculation
In order to let the player know his score
As a CEO of TheBowlingInc
I want to calculate the score at the end of a bowling fame


Next we Save And Run Cucumber from the c:\cukes directory. This step I hereby alias to SARC. This outputs

c:\cukes>cucumber
Feature: Bowling Game Score Calculation
In order to let the player know his score
As a CEO of TheBowlingInc
I want to calculate the score at the end of a bowling fame

0 scenarios
0 steps
0m0.000s


So now that prompts us : we need Scenarios. A Feature may contain multiple scenarios (which collectively validate the feature).
A Scenario is executable. A Scenario takes the form

Scenario: <text description>
Given <context>
When <action>
Then <user-visible outcome>


So we expand our feature like this.

Feature: Bowling Game Score Calculation
In order to let the player know his score
As a CEO of TheBowlingInc
I want to calculate the score at the end of a bowling fame

Scenario: All Gutters score 0
Given I am starting a new game
When I roll 20 gutter balls
Then the score should be 0
And the game should be over


In addition you can write And <step> to have multiple steps – the above example is equivalent to 2 Then clauses. You can use it under Given/When too. Save and run cucumber again. (or SARC from here on)

[cukes_01.jpg]

For some reason the snippets don’t show up. So we play a little trick. Create a subfolder under features called step_definitions. Create a new blank file called bowling_game_steps.rb in it. Run cucumber again. Now you should see some snippets. Copy them from the console and paste into the blank file. SARC. You should now see that the first step is shown as a TODO and the rest are skipped (and in a different step-color to boot)

The first snippet looks like


Given /^I am starting a new game$/ do
pending
end


We need to define a “step” – specify the action to be taken i.e. when cucumber encounters a matching Given clause for the regex, what action should it take? You define that as the content of the block. Let’s say we want to create a new instance of a game. So replace `pending` with
`@game = BowlingGame.new`
SARC and now we have a familiar color – Red (of the Red-Green-Refactor fame). We’re notified that our step has failed.


[cukes_02.jpg]

We have no class called Bowling Game yet. Create a new subfolder under features called support to house our app classes. Create a new file in there ; features\support\bowling_game.cs

class BowlingGame; end

SARC and we’re green…. partially.. better than red. Cucumber now points us to the next step.

[cukes_03.jpg]

I’ll define all the steps like this.. while you take a breather. There. The updated version

Given /^I am starting a new game$/ do
@game = BowlingGame.new
end

When /^I roll (\d+) gutter balls$/ do |count|
count.to_i.times{
@game.roll(0)
}
end

Then /^the score should be (\d+)$/ do |expected_score|
@game.score.should == expected_score.to_i
end

Then /^the game should be over$/ do
@game.should be_over
end

When /^my rolls are (.*)$/ do |rolls|
rolls.split(' ').each{|roll|
@game.roll(roll.to_i)
}
end


NOTE:
  1. The second step is an example of a parameterized step. If the regex in the step definition contains groups, the matched contents are passed in as parameters to the block for the step. Parameter passed in are strings so you need to convert it to the right type before use. Standard regexp rules apply for matching groups. So now the step can match both ‘When I roll 5 gutter balls’ and When I roll 20 gutter balls’. You also see parameters highlighted distinctly in cucumber output. Cool!
  2. Then steps use a new should method which is added to all objects. You can read more about such helper methods here and here
  3. Cucumber tells after each step what needs to be done next. This rhythm is similar to the TDD approach.


Here’s the updated bowling_game.rb with ‘the simplest thing that could possibly work’

class BowlingGame
def roll( pins_knocked_down)
end
def score
0
end
def over?
true
end
end


SARC this time we specify the no source
option as a CL argument

 >cucumber –s 


[cukes_04.jpg]
And we’ve reached the promised land - plain text file story/features that can be verified automatically at the push of a button. That's pretty cool.

Just to reiterate the folder structure.


[folder_hier.jpg]

In the next post, we move up the learning curve with Scenario tables and tagging.

How to talk to a C# / ASP.Net web service via Ruby / Rails

Maybe not the right answer.. but I took the path of least resistance and succeeded. Yay Ruby!

First I did a dummy Asp.net Xml Web service as shown in this MSDN walkthrough which does F to C temp conversion. This meant that I can access my legacy/existing C# code without any interop hassles. Yes it is SOAP based (and old-school) but it will have to do for now. You can test out the web service via a dummy stub page that exercises the web service. You can also infer the needed urls from this page.

Next I found this uber-blog post by Ryan Heath and it was all downhill after that.

You write a wrapper Ruby class like this which gets the WSDL and sets itself up. You can then just call your Web methods on it!


   require 'soap/wsdlDriver'

class TempConverterWrapper
attr_accessor :endpoint, :service_name
def initialize(endpoint, service)
@endpoint = endpoint
@service = service
end

def convert_fahrenheit_to_celsius(temp)
soap = wsdl.create_rpc_driver
response = soap.convert_fahrenheit_to_celsius(:temp_in_fahrenheit => temp)
soap.reset_stream
response.convert_fahrenheit_to_celsiusResult
end


private
def wsdl
puts "http://#{@endpoint}/#{@service}.asmx?WSDL"
SOAP::WSDLDriverFactory.new("http://#{@endpoint}/#{@service}.asmx?WSDL")
end
end


Your main / irb code to exercise this web service. More bang / LOC!

puts "Enter a fahrenheit value to convert to celsius... via a Web Service"
temp_fahrenheit = gets.to_f

wrapper = TempConverterWrapper.new('localhost:1464', 'TemperatureConverter')
puts "The corresponding celsius value is #{wrapper.convert_fahrenheit_to_celsius(temp_fahrenheit)}"

How to show a Tree (TreeView) in a Rails view?

Well there seems to be no one-way for displaying a tree in Rails. But it has to be some javascript/AJAX doing its thing with CSS on HTML lists. So I took a look at YUI Tree (the first thing that google threw up) but it felt bloated and the learning curve was a bit too steep. Some time later.. I found a tree plugin for JQuery and also found that there is a RailsCast to use JQuery with Rails (so I knew its possible to interop).
I've been wanting to look at what JQuery is - with the massive good-will it is building up. Did a couple of tutorials 1 and 2 on their site to get started. Downloaded the jquery.js file (1 file for all the goodness !! awesome).
Next it's time to download the zip for the excellent JQuery tree plugin by Jorn Zaefferer - incidentally its the same person who wrote the second tutorial. I felt better about my chances for success.

I'm assuming you have a Rails app and the code for your hieararchy all done to this point. It's going to be a simple tree showing the hierarchy (no fancy AJAX callbacks or delayed loading of children... although I think its supported)

Unzip the treeview plugin folder v1.4 (it has a version of jquery bundled too inside the lib subfolder). I see
  • jquery.treeview.XXX.js (the javascript files) : Moved them to my public\javascripts folder within my Rails project folder. Also copied the lib subfolder here.
  • jquery.treeview.css (the CSS stylesheet) : Moved them to my public\stylesheets folder
  • images subfolder : Moved the images in this folder to a new subfolder public\images\jquery.treeview.images
Now the CSS file has references to the images. So do a find-replace to make sure all the images are reachable in their new locations; "url(images/" becomes "url(../images/jquery.treeview.images/"

I have a show action on my controller that creates @root_node which is a typical Node object with a Children attribute - an array of child nodes. So now we need something to render it as an hierarchical HTML list - a Rails helper method for your controller


  def display_segment( node )

html = "<li>"
node_class = node.children.length == 0 ? "file" : "folder"
html << "<span class=\"#{node_class}\">#{h(node.to_s)} </span>"
html << "<ul id=\"children_of_#{h(node.sid)}\">"
node.children.each{|child_node|

html << display_segment( child_node )
}
html << "</ul></li>"
end


Let's also take a look at the view show.html.erb


<html>
<head>
<h3> You are viewing <%= @data_file_path %> </h3>

<title><%= controller.action_name %></title>
<%= stylesheet_link_tag 'appstylesheet'%>
</head>

<body>
<ul id="my_tree" class="filetree">
<%= display_segment(@root_node) %>
</ul>

</body>
</html>


Things to note
  • First we need an enclosing ul block with css class set to filetree. This would be picked up our custom javascript snippet to JQuery-magically turn into a tree. So we need to make a note to give it a good id - here my_tree
  • Next the content is rendered via our recursive helper function. Children of a node are in a nested ul block. Each leaf-node is a li item and has css class as "file". parents have css class as "folder"
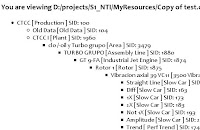
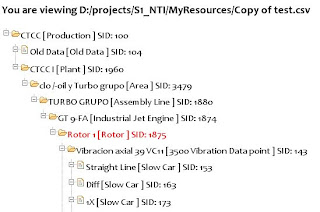
So now it should look something like this.


Now the stage is set for JQuery to do its thing. First lets introduce these 2 lines to the head tag of our view.


<%= javascript_include_tag 'lib/jquery', 'jquery.treeview', 'custom' %>
<%= stylesheet_link_tag 'jquery.treeview.css' %>


So we say we want to use the jquery javascript file, followed by the treeview plugin and finally our own custom javascript file that we'll write next.
We also want to use the treeview CSS stylesheet. You can do a "View Source" in firefox to see what the translated HTML looks like - std. stuff.

We're nearing the end here - Our \public\javascripts\custom.js file to sprinkle some JQuery dust on this thing


$(document).ready( function() {
$("#my_tree").treeview();
} );


Here we're giving a function to be executed when the page/document is ready. This function finds our top-level list element with id = "my_tree" and calls the treeview() method on it.


Victory Jig time!

Illustrated How to do a simple C++ DLL project in Visual Studio ?

Agreed that it isn't a big deal ... however I struggle with this everytime I dip my toes after a long managed stint.. and after a question on stackoverflow - it seems I'm not alone.

So here goes.. Fire up Visual Studio

Ctrl+Shift+N to go to the new project dialog or Right click on the Solution Node - Add - New Project... Press Next instead of Finish to go to the next screen.


So when I do that I have the following structure.
  • Stdafx.h & stdafx.cpp – defines and includes standard header files. Leave unmodified.
  • WinHookFacade_VS2005.cpp – defines the DLL Main function (entry point). Leave unmodified unless you have your very own dllmain.cpp with custom code.
  • Readme.txt – just a text file, you can stuff some info in.


Try to build the project. It should build fine.. do it just to be sure.
Next step include all your .h and .cpp into the project. Right click on the project in solution explorer - Add - Existing item..

You may have build failures.. now its time to enter the maze of C++ Project settings

C++ Settings


If you want additional directories to be looked for resolving header includes. Right click on Project Node - Properties
IMPORTANT: Check the Configuration combobox to read “All Configurations” each time you change a project setting else you risk the debug and release configurations getting out of sync.


Also for some reason, precompiled headers are frowned upon at my workplace. So I turn them off too..


Define any preprocessor symbols you want to.
DETOUR example.. WINHOOKFACADE_EXPORTS is a symbol defined here - which will cause my functions to be exported from here. Referencing projects will not have this symbol defined and will import my functions. The header files begin like this


#ifdef WINHOOKFACADE_EXPORTS
#define WINHOOKFACADE_API __declspec(dllexport)
#else
#define WINHOOKFACADE_API __declspec(dllimport)
#endif

void WINHOOKFACADE_API Hook();


Also in this case, you may want different symbols defined in both configurations. E.g. DEBUG is defined only in Debug configuration and so on.. so change the Configuration Combobox accordingly before making changes.


Linker Settings


To change the default location of the built binary file: E.g. I want the output to be generated in a SolutionDir\bin\Debug or Release. So you can use the helpful macros by pressing the tiny button on the right of the input field
$(SolutionDir)bin\$(ConfigurationName)\$(ProjectName).dll


I also keep the lib files that I need to link to in SolutionDir\bin\lib subfolder. So specify the additional folders to scan for .lib files


To specify the lib files you need to link to...


To specify where the lib file for the current project should be generated. In my case I want it to also go in under SolutionDir\bin\lib and named WinHookFacade_Debug.lib or WinHookFacade_Release.lib
Use the GUI macro helper thingie to come up with your own incantation. In my case it is

$(SolutionDir)bin\lib\$(ProjectName)_$(ConfigurationName).lib


Pre-Post Build steps:
If you’d like to do some tasks (like copying over something) before or after a build, check out the Build events node under Configuration Properties. I’d recommend against using this.. having this in the build script (e.g. ant or nant) makes it more visible – it tends to get hidden and out of sync in the project properties.

Phew! That's it. Take a nap now to recharge those brain cells.

How to compile ruby from source on Windows?

I wanted to play with the latest version of ruby. I got the win32 binary zip of 1.9.1 p0 - however irb used to popup an error message on startup - used it for sometime but then I decided to fix it. Checked back on ruby's download page and found an updated version p129. Downloaded it but it was a source zip.

I wasn't sure that compiling it from source would be trivial... however it reinforced the simplicity of the ruby way. Summarizing the steps I found on this post at ruby-forum.com

  1. Get the source zip from the download page and unzip it locally to say c:\ruby-src
  2. Open the Visual Studio Command prompt (I have VS2008 on WinXP SP2)
  3. Make a folder for your build say c:\ruby-build. Move into it / change dir
  4. c:\ruby-build> c:\ruby-src\ruby-1.9.1-p129\win32\configure.bat
  5. c:\ruby-build> nmake
  6. c:\ruby-build> nmake test
  7. c:\ruby-build> nmake DESTDIR=c:/ruby-build install
That's it.. you'll find the binaries within a usr folder within the ruby-build folder.

How to create a global (system) windows hook ?

What are Windows Hooks? You probably don't want to know that :) Good starting points are
The MSDN door to hooks
Win32 Hooks


A global / system hook would be “I want to be called when anyone does X in any process” ; the other kind is when “I want to be called when anyone does X in ThreadID#Y”. Creating a global windows hook cannot be done in managed code except (some keyboard/mouse hooks) via P/Invoke (so save yourself some time although local hooks are possible).
Windows would callback on the Hook function ; also called the filter function. The signature -


LRESULT CALLBACK FilterFunctionForHook(int code, WPARAM wParam, LPARAM lParam)

For global hooks, the filter function should be contained in an unmanaged DLL – I created one called WinHookFacade.dll. This unmanaged DLL would be injected into each process. Also the copy of the DLL loaded into other process cannot be explicitly unloaded – will unload when the process goes down. Also any bad code in the hook function can result in bad scary things and may require the user to go through a logoff-login or reboot cycle. Avoid if possible because global hooks will extract their pound of performance. But when has that stopped us programmers ? ;) Hence exercise caution with global hooks.

To create a global hook, you therefore need to create an exe project that hooks/unhooks the filter function and a dll project that contains the filter function.

The Hook


void Hook()
{
HINSTANCE hCurrentDll = GetModuleHandle(_T("WinHookFacade.dll"));
g_HookHandle = SetWindowsHookEx(WH_CBT,
FilterFunctionForHook,
hCurrentDll,
0);

if (g_HookHandle == NULL)
throw new std::exception("Unable to hook");
}


The key here would be the SetWindowsHookEx Win32 API function. The first parameter is what type of hook you’d like to register for – See this page for available types. In this example, WH_CBT means events related to windows (creation,activation,destructions etc). The second parameter is the name of the Hook/Filter function that shall be called back by the OS – detailed below. The third parameter is a handle to the DLL containing the hook function for global hooks (if null, it indicates a thread-specific hook). The fourth parameter is 0 for global hooks (for thread/local hooks, it is the Thread ID you want to hook into).

The Callback


LRESULT CALLBACK FilterFunctionForHook(int code, WPARAM wParam, LPARAM lParam)
{
if (code >= 0)
{
//your code e.g.
switch(code)
{
case HCBT_ACTIVATE:
// log the window title
...
}
return CallNextHookEx(g_HookHandle, code, wParam, lParam);
}


This function would be called in the process in which the event occurs (e.g. where a window is created). Process Isolation : a process cannot run custom code into another process; hence DLL injection. Also the CallNextHookEx Win32 API function must be called to pass control onto the next filter function in queue passing it the original arguments received to be a good citizen. The first parameter is the Hook Handle obtained when you registered the Hook function.

IMPORTANT: However this value must be the same across all instances of the shared Hook DLL & must be available within the filter function. For this reason, you need to create the “hook handle” in a shared data segment Whaa.. how do I do that? Declare your HHOOK variable like this


#pragma data_seg (".MY_HOOK_DATA")
HHOOK g_HookHandle = 0;
#pragma data_seg()


This function is supposed to call the next function in queue without doing anything if the code argument is less than zero. If not, the function may execute custom code to do specific tasks. The wParam and lParam arguments are pointers to handles/structures containing additional info. The exact type of structure depends on the value of the code parameter – check msdn for the page for the specific alias of the filterfunction e.g. in my case it would be CBTPROC; wParam is a handle to the window and lParam is a pointer to a struct

Cleanup


void Unhook()
{
if (!UnhookWindowsHookEx(g_HookHandle))
throw new std::exception("Unhook failed!");

g_HookHandle = NULL;
}


Here the primary player is the UnhookWindowsHookEx Win32 API Function. In case of an error, you’d need to use the fugly GetLastError() function to know what really went wrong.

Test Drive


Now to take this for a spin, create an exe project referencing the DLL containing the hook function. The main function will call on the exported functions as shown below..

int _tmain(int argc, _TCHAR* argv[])
{
char buffer[256];
try
{
printf("Hooking...");
Hook();
printf("Done.\n");


printf("Press Enter to exit\n"); // hook is running
gets(buffer);

printf("Unhooking...");
Unhook();
printf("Done. Woohoo!!\n");


That’s all there is to it.
CAUTION: Also if you get something wrong, the effects would be felt immediately – in my case, the UI would freeze as soon as my botched hook function was registered; my taskbar would be nuked and random error dialogs from running apps. But nothing a reboot can’t solve! C++ string compiler errors, WinAPI gotchas & hooks -- It was like walking on a tightrope in dark windy conditions. <runs back to the managed side>

Ruby is slow... until you learn to write good code.

I wrote up a small program to find prime-numbers between x and y ; implemented the Sieve of Eratosthenes.
The SOE is basically where you take all numbers (say 1-100) into an array. Cross out 1. Loop from 2-Sqrt(N) i.e. 2-10. Now cross out every multiple of 2 in the array. Next cross out every multiple of 3.. and so on. Finally all the numbers that aren't crossed out are prime.

However I did a very simplistic implementation (test-driven) to boot. All the tests did pass.. however running it to get all primes between 10K and 100K took 34 secs to execute. And I was on the new n improved ruby 1.9 with a better VM. I switched to the stable ruby 1.8.6 and it took ~60 secs. So now I turned back to my primary Weapon C#. The same steps implemented in C# took 722 msecs. So now there were 2 possibilities
1. Ruby is sloooow (the usual gripe)
2. Something in my algorithm is messed up.

So I posted my source onto StackOverflow - (my current fave time sink :) to get some eyeballs to look at the problem.
So here's my naive implementation


class PrimeGenerator
def self.get_primes_between( x, y)
sieve_array = Array.new(y) {|index|
(index == 0 ? 0 : index+1)
}

position_when_we_can_stop_checking = Math.sqrt(y).to_i
(2..position_when_we_can_stop_checking).each{|factor|
sieve_array[(factor).. (y-1)].each{|number|
sieve_array[number-1] = 0 if isMultipleOf(number, factor)
}
}

sieve_array.select{|element|
( (element != 0) && ( (x..y).include? element) )
}
end
def self.isMultipleOf(x, y)
return (x % y) == 0
end
end


# Benchmarking code

require 'benchmark'
Benchmark.bm(30) do |r|
r.report("Gishu") { a = PrimeGenerator.get_primes_between( 1_000, 10_000) }
end


A few people got back with what might be the problem.
One of the first and most voted issue was the slicing the array to get a new subset array. That's got to be expensive inside a loop for an array of this size. Obviously I was using for loops in C# (since C# doesn't have Ruby's each)


for index in factor..y-1 do
sieve_array[index] = 0 if isMultipleOf(index+1, factor)
end


That shaved off 8 secs - 24%. But still 26 secs. Another optimization was to reduce iterations - instead of checking each number with IsMultiple(number, _loopVar), set the 'step' for the loop to equal _loopVar (so from 2 you go 4,6,8,10...)

And finally Mike Woodhouse dispatched a homer. He posted a tiny snippet that did the same thing in under 1 sec. No that's not a typo.


def sieve_to(n)
s = (0..n).to_a
s[0]=s[1]=nil
s.each do |p|
next unless p
break if p * p > n
(p*p).step(n, p) { |m| s[m] = nil }
end
s.compact
end

# Usage:
# puts sieve_to(11).select{|x| x>=3}.inspect


user system total real
Gishu 27.219000 0.000000 27.219000 ( 27.375000)
Mike 0.141000 0.000000 0.141000 ( 0.140625)

I then had to know how he did it..

  1. Smart#1: He skips if array[_loopvar] is already 0. whereas if array[6] is crossed out due to 3, I did a scanning run to set all multiples of 6 to 0 which were already 0.(now down to 6 secs)

  2. Smart#2: Use the Numeric#step trick to jump to the next multiple vs traversing entire list with an IsMultiple check (now down to 0.25 secs)

  3. Smart#3: He begins the inner loop with Square of p. e.g if _loopvar is 7, I used to check from 8->end. Mike checks from 49->end. This one was a little tricky to figure out.. the reason is 7x2, 7x3, 7x4, 7x5, 7x6 have already been crossed out when _loopVar was 2,3,4,5,6 respectively. (now down to 0.21 secs)

  4. Smart#4: Smart use of Ruby's nil for crossed out vs my choice of 0. That followed by Array#compact reduces the number of elements for the final select operation to get primes between x and y (now down to 0.18 secs.)


So after all that it's Ruby 0.15 secs and C# (with same optimizations) 0.028 secs, much more easy to take in.

An interesting thought to end this post is that even with the naive first implementation C# performed reasonably well... under a sec. I'd have moved on to the next task. Ruby on the other hand slowed to a crawl forcing me to take another look for optimizations. In a indirect sort of way, C#'s superior performance could be hiding bad/substandard solutions and letting programmers get away with it...

MergeSort in Ruby

Finally got the ball rolling on the 'Introduction to Algorithms' book.. What I figured was that I implement the sorting algorithms in ruby - help me get better at ruby AND algorithms.
I've got to confess.. I'm test-infected so I'm gonna TDD my way out. This series of posts are not going to be in a walkthrough style of narration.. I'm just going to post complete samples. The order of methods indicate how the code was built up.. (the first method is the 'oldest'.

Here's merge_sort_test.rb [The Test Fixture]
--
require 'test/unit'
require 'merge_sort'
class TestMergeSort < Test::Unit::TestCase
def test_partition_array_with_even_number_of_elements
left, right = MergeSort.partition_array [11, 5, 9, 15]
assert_equal [11, 5], left
assert_equal [9, 15], right
end
def test_partition_array_with_odd_number_of_elements
left, right = MergeSort.partition_array [11, 5, 45, 9, 15]
assert_equal [11, 5], left
assert_equal [45, 9, 15], right
end

def test_merge_arrays
assert_equal( [10,20,30,40],
MergeSort.merge_arrays( [10,30], [20,40] ) )

assert_equal( [1, 3, 5, 9],
MergeSort.merge_arrays( [1, 5, 9], [3] ) )
assert_equal( [1, 3, 5, 9],
MergeSort.merge_arrays( [3], [1,5,9] ) )
end

def test_sort
assert_equal [0, 1, 2, 3, 4, 5, 6, 7, 8, 9],
MergeSort.sort([ 8, 3, 4, 0, 9, 1, 2, 7, 6, 5])
end
end


--
merge_sort.rb [The Implementation]
--
class MergeSort 
def self.partition_array( input_array)
mid_index = (input_array.length / 2) - 1
[input_array[0..mid_index], input_array[(mid_index+1)..(input_array.length-1)]]
end

def self.merge_arrays(array1, array2)
merged_array = []

until (array1.empty? || array2.empty?) do
if (array1[0] < array2[0])
merged_array << array1.shift
else
merged_array << array2.shift
end
end

merged_array + array1 + array2
end

def self.sort( input_array )
return input_array if (input_array.length < 2)

left, right = self.partition_array input_array
sortedLeft = self.sort left
sortedRight = self.sort right
y = self.merge_arrays( sortedLeft, sortedRight )
end
end


--
A command line 'runner'/'main' function
--
# Console runner / main
if !ARGV[0].nil?
input = []
ARGV.each{|x| input << x.to_i}
print MergeSort.sort(input).inspect
end


--
>ruby merge_sort.rb 90, 100, 40, 10, 45
[10, 40, 45, 90, 100]

And we're done! IMHO The Ruby Array class really shines here w.r.t. readability.